 SpringBoot整合SpringSecurity详解,认证授权从未如此简单
作者:鱼仔
博客首页: codeease.top (opens new window)
公众号:神秘的鱼仔
# (一)概述
对于一个Web项目来说,最重要的不是功能酷不酷炫,而是这个项目安不安全。做过项目的人都知道,一个项目在上线前一定会经过安全漏扫,只有通过安全漏扫后这个项目才能正式上线。 Spring Security是一个功能强大且高度可定制的身份验证和访问控制框架,类似的安全框架还有Shiro。 Spring Security主要做两个事情,认证、授权。
# (二)前期项目搭建
为了更好的展示SpringSecurity,我们先搭建一个简单的web项目出来。引入thymeleaf依赖
<dependency>
    <groupId>org.springframework.boot</groupId>
    <artifactId>spring-boot-starter-thymeleaf</artifactId>
</dependency>
<dependency>
    <groupId>org.thymeleaf</groupId>
    <artifactId>thymeleaf-spring5</artifactId>
</dependency>
<dependency>
    <groupId>org.thymeleaf.extras</groupId>
    <artifactId>thymeleaf-extras-java8time</artifactId>
</dependency>
2
3
4
5
6
7
8
9
10
11
12
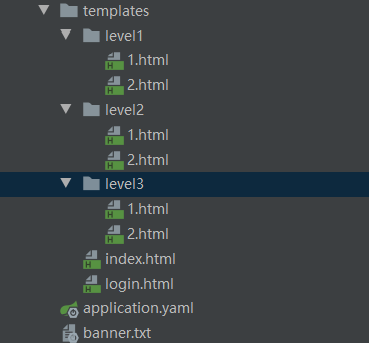
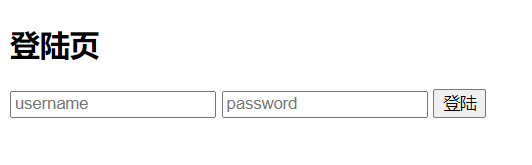
新建一个登陆页,一个首页,然后几个不同等级的展示页面: login.html
<!DOCTYPE html>
<html lang="en">
<head>
    <meta charset="UTF-8">
    <title>登陆页</title>
</head>
<body>
<div>
    <form>
        <h2>登陆页</h2>
        <input type="text" id="username" placeholder="username">
        <input type="password" id="password" placeholder="password">
        <button type="button">登陆</button>
    </form>
</div>
</body>
</html>
2
3
4
5
6
7
8
9
10
11
12
13
14
15
16
17
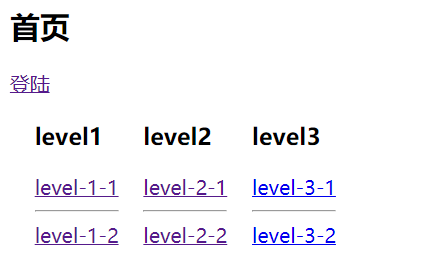
首页index.html,主要就展示不同等级的按钮,为之后授权做准备
<!DOCTYPE html>
<html lang="en">
<head>
    <meta charset="UTF-8">
    <title>首页</title>
</head>
<body>
<div>
    <h2>首页</h2>
    <a href="/login">登陆</a>
    <div style="overflow: hidden">
        <div style="float: left;margin-left: 20px">
            <h3>level1</h3>
            <a href="/level1/1">level-1-1</a>
            <hr>
            <a href="/level1/2">level-1-2</a>
        </div>
        <div style="float: left;margin-left: 20px">
            <h3>level2</h3>
            <a href="/level2/1">level-2-1</a>
            <hr>
            <a href="/level2/2">level-2-2</a>
        </div>
        <div style="float: left;margin-left: 20px">
            <h3>level3</h3>
            <a href="/level3/1">level-3-1</a>
            <hr>
            <a href="/level3/2">level-3-2</a>
        </div>
    </div>
</div>
</body>
</html>
2
3
4
5
6
7
8
9
10
11
12
13
14
15
16
17
18
19
20
21
22
23
24
25
26
27
28
29
30
31
32
33
另外还有几个不同等级的页面
分别在body中写上自己对应的编号。
<!DOCTYPE html>
<html lang="en">
<head>
    <meta charset="UTF-8">
    <title>Title</title>
</head>
<body>
level-1-1
</body>
</html>
2
3
4
5
6
7
8
9
10
最后编写一个controller来接收请求:
@Controller
public class RouteController {
    @RequestMapping({"/","/index"})
    public String index(){
        return "index";
    }
    @RequestMapping("/login")
    public String toLogin(){
        return "login";
    }
    @RequestMapping("/level1/{id}")
    public String level1(@PathVariable("id")String id){
        return "level1/"+id;
    }
    @RequestMapping("/level2/{id}")
    public String level2(@PathVariable("id")String id){
        return "level2/"+id;
    }
    @RequestMapping("/level3/{id}")
    public String level3(@PathVariable("id")String id){
        return "level3/"+id;
    }
}
2
3
4
5
6
7
8
9
10
11
12
13
14
15
16
17
18
19
20
21
22
23
最终的效果如下:
首页效果如下:
# (三)认证与授权
在上面的这个页面中有两个问题,第一未做登陆认证的处理,第二三个level页面现在都能被所有人访问,未做授权。而上面的这两个问题都可以通过SpringSecurity来解决。
实现SpringSecurity只需要引入spring-boot-starter-security依赖,进行少量的配置,就可以实现强大的安全管理功能。
在正式接触前我们需要记住几个类: 1.WebSecurityConfigurerAdapter :自定义Security策略 2.AuthenticationManagerBuilder:自定义认证策略 3.@EnableWebSecurity :开启WebSecurity模式
我们新建一个config包,创建一个配置类SecurityConfig,继承WebSecurityConfigurerAdapter接口
@EnableWebSecurity
public class SecurityConfig extends WebSecurityConfigurerAdapter {
    //授权
    @Override
    protected void configure(HttpSecurity http) throws Exception {
        //首页所有人都能访问,level页面只有有权限的人才能访问
        http.authorizeRequests()
                .antMatchers("/").permitAll()
                .antMatchers("/level1/**").hasRole("vip1")
                .antMatchers("/level2/**").hasRole("vip2")
                .antMatchers("/level3/**").hasRole("vip3");
        //没有权限默认跳到登陆页,默认会重定向到/login
        http.formLogin();
    }
    //认证
    @Override
    protected void configure(AuthenticationManagerBuilder auth) throws Exception {
        auth.inMemoryAuthentication()
                .passwordEncoder(new BCryptPasswordEncoder())
                .withUser("root").password(new BCryptPasswordEncoder().encode("123456")).roles("vip1","vip2","vip3")
                .and()
                .withUser("admin").password(new BCryptPasswordEncoder().encode("123456")).roles("vip1");
    }
}
2
3
4
5
6
7
8
9
10
11
12
13
14
15
16
17
18
19
20
21
22
23
24
通过上面的这段代码,实现了授权和认证的功能,其中认证方法在内存中存入的用户信息。正常情况下用户的数据是从数据库中获取,授权功能给不同的页面设置不同的角色。
我们再次打开首页http://localhost:8080/,所有人都有权限看到,当我们点击里面的level1 2 3里的链接时,自动跳转到了http://localhost:8080/login
你会发现这个登陆页面明明不是自己写的,怎么就出现了?其实这就是SpringSecurity所提供的,http.formLogin();这段代码做了对登陆页的处理,没有权限默认跳到登陆页,默认会重定向到/login。
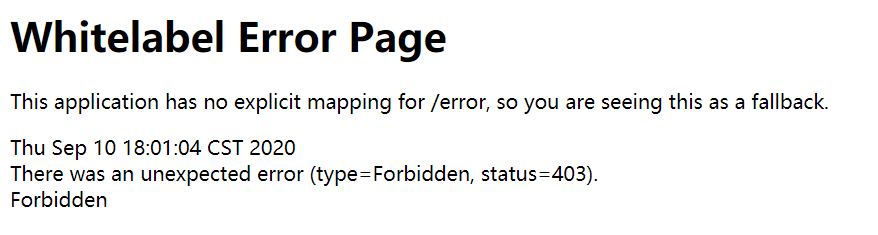
当我们用不同权限的账号登陆时,就能点击不同权限的链接,如果点击权限外的链接时,会报403错误
# (四)注销的操作
既然有认证和授权,那么一定免不了注销的功能,SpringSecurity实现注销很简单,你只需要在SecurityConfig类的授权代码里增加一条代码。
//登出
http.logout();
2
然后在前端index.html代码中增加一个注销的标签
<a href="/logout">注销</a>
点击首页的注销按钮后就会跳转到SpringSecurity的注销提示界面
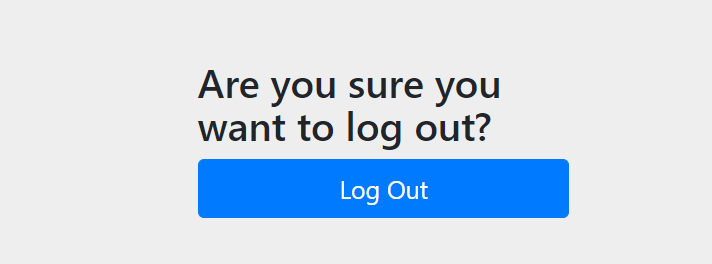
点击logout按钮后自动退出到登陆页面,如果你希望注销后还是回到首页的话,可以将注销代码修改成下面的方式:
http.logout().logoutSuccessUrl("/");
# (五)记住密码功能
一般情况下登陆页面肯定会有一个记住密码的功能,这个功能其实就是在本地生成一个cookie,用原生的java实现虽然不难,但是也需要一定的代码。而使用SpringSecurity只需要一行:
http.rememberMe();
再次进入登陆页面后,就可以看到增加了一行记住密码的选项
