 Hystrix的入门和高级使用
作者:鱼仔
博客首页: codeease.top (opens new window)
公众号:神秘的鱼仔
# (一)Hystrix的介绍
微服务的调用有时候会存在连环调用,即微服务A调用微服务B,微服务B调用微服务C。此时当微服务C不可用的时候,所有的请求都会阻塞到微服务B,可能会导致微服务B的资源耗尽,进而使得微服务A的阻塞,最终让整个系统崩溃,这就是雪崩效应。
当然一个需要投入使用的项目绝对不能有发生雪崩,因此一些容错框架就出现,Hystrix是Netflix开源的一款容错框架,Hystrix主要的作用为
- 对来自依赖的延迟和故障进行防护和控制——这些依赖通常都是通过网络访问的
- 阻止故障的连锁反应
- 快速失败并迅速恢复
- 回退并优雅降级
- 提供近实时的监控与告警
# (二)Hystrix的入门实战
我们之前介绍了使用RestTemplate调用微服务,也介绍了用feign调用微服务,这两者都可以使用Hystrix,但是有些不同,下面就分别来介绍两者。要实现的内容是当访问时间超时,则自动跳转到降级方法。项目源码放在文末。
# 2.1 对RestTemplate的支持
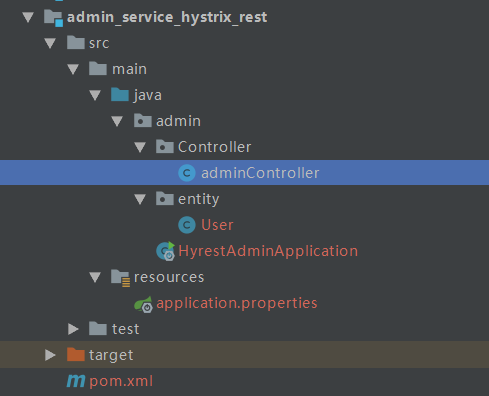
为了和feign区分开来,我新建了一个module,包含一个adminController,一个实体类,一个启动类,和配置文件。其余的module都和之前的项目一致。

使用hystrix有以下四步:
1.引入依赖
2.在启动类中激活Hystrix
3.配置熔断触发的降级逻辑
4.在需要受到保护的接口上使用@HystrixCommand配置
引入hystrix的依赖
<!--引入hystrix-->
<dependency>
    <groupId>org.springframework.cloud</groupId>
    <artifactId>spring-cloud-starter-netflix-hystrix</artifactId>
</dependency>
2
3
4
5
在启动类中用@EnableCircuitBreaker激活Hystrix
@SpringBootApplication
@EntityScan("com.sdxb.admin.entity")
@EnableEurekaClient
//激活hystrix
@EnableCircuitBreaker
public class HyrestAdminApplication {
    @LoadBalanced
    @Bean
    public RestTemplate restTemplate(){
        return new RestTemplate();
    }
    public static void main(String[] args) {
        SpringApplication.run(HyrestAdminApplication.class,args);
    }
}
2
3
4
5
6
7
8
9
10
11
12
13
14
15
配置熔断触发的降级逻辑
熔断触发的意思是当请求微服务连接超时或者未响应的时候,会自动跳转到降级方法上,降级方法和需要受到保护的方法返回值是一样的
//降级方法,和需要受到保护的方法的返回值是一样的
public User userfallback(int id){
    User user=new User();
    user.setUsername("触发降级");
    return user;
}
2
3
4
5
6
在需要受到保护的接口上使用@HystrixCommand配置
使用@HystrixCommand,用fallbackMethod 参数调用降级方法,意思是如果满足熔断的条件就会触发降级方法。
@HystrixCommand(fallbackMethod = "userfallback")
@RequestMapping(value = "/{id}",method = RequestMethod.GET)
public User getuser(@PathVariable int id){
    User user= restTemplate.getForObject("http://userservice/user/"+id,User.class);
    return user;
}
2
3
4
5
6
测试:
配置该项目的端口为9004,启动EurekaApplication和HyrestAdminApplication,但是不启动UserApplication,理论上请求无法找到user的信息,这时就会报错,但是因我们用了hystrix,所以会跳转到降级方法,输入http://localhost:9004/admin/1,查看结果:

统一的降级设置
如果为每一个方法都分别是指降级方法,会很麻烦,Hystrix也提供了统一的降级方法,首先写一个统一的fallback方法,不带参数
//指定统一的fallback方法,没有参数
public User defaultfallback(){
    User user=new User();
    user.setUsername("触发降级");
    return user;
}
2
3
4
5
6
在类上用@DefaultProperties(defaultFallback = "defaultfallback")设置统一的降级方法,原本写在方法上的@HystrixCommand注解就不需要带参数了

连接超时时间设置:
Hystrix默认当响应时间大于1S时就跳转到降级方法,这里可以自定义设置超时时间
#配置hystrix连接超时时间,默认1秒:
hystrix.command.default.execution.isolation.thread.timeoutInMilliseconds=3000
2
# 2.2 对Feign的支持
再创建一个module命名为admin_service_hystrix_feign:项目结构和之前feign的项目结构一致:
引入依赖(feign中已经继承了Hystrix,如果已经引入了feign就不用再引入Hystrix依赖)
在feign中配置开启Hystrix
在配置文件中开启对hystrix的支持
#开启对hystrix的支持
feign.hystrix.enabled=true
2
自定义一个接口的实现类,这个类就是熔断触发的降级逻辑
之前使用feign进行服务调用时写过UserFeignClient接口,新建一个类继承该接口,用于降级返回
@Component
public class UserFeignClientFallBack implements UserFeignClient {
    @Override
    public User findbyid(int id) {
        User user=new User();
        user.setUsername("使用feign降级处理");
        return user;
    }
}
2
3
4
5
6
7
8
9
修改feignClient接口增加降级方法的支持
在之前写的feign接口的@FeignClient注解上增加fallback参数,指定降级方法
/**
 * 声明需要调用的微服务名称
 *      name:服务名称
 *      fallback:降级处理方法
 */
@FeignClient(name = "userservice" , fallback = UserFeignClientFallBack.class)
public interface UserFeignClient {
    /**
     * 声明需要调用的微服务接口
     */
    @RequestMapping(value = "/user/{id}",method = RequestMethod.GET)
    public User findbyid(@PathVariable("id") int id);
}
2
3
4
5
6
7
8
9
10
11
12
13
运行结果和RestTemplate支持一样。
# (三)通过Actuator获取hystrix的监控信息
通过actuator可以获取到hystrix所监控到的信息,操作过程也很简单,继续在admin_service_hystrix_feign项目中进行
引入依赖
<!--引入hystrix-->
<dependency>
    <groupId>org.springframework.cloud</groupId>
    <artifactId>spring-cloud-starter-netflix-hystrix</artifactId>
</dependency>
<!--引入actuator-->
<dependency>
    <groupId>org.springframework.boot</groupId>
    <artifactId>spring-boot-starter-actuator</artifactId>
</dependency>
2
3
4
5
6
7
8
9
10
在启动类中用@EnableCircuitBreaker注解激活hystrix
@SpringBootApplication
@EntityScan("com.sdxb.admin.entity")
@EnableEurekaClient
@EnableFeignClients
//激活hystrix
@EnableCircuitBreaker
public class HyfeignAdminApplication {
    public static void main(String[] args) {
        SpringApplication.run(HyfeignAdminApplication.class,args);
    }
}
2
3
4
5
6
7
8
9
10
11
配置application.properties,暴露actuator的端点
如果在配置文件中不加上这条配置信息,只能获取到为数不多的几个端点
#暴露actuator提供的端点
management.endpoints.web.exposure.include = *
2
重新启动项目,在浏览器中输入http://localhost:9005/actuator/hystrix.stream获取数据流,你可以看到界面上一直显示ping,因为此时我们还没调用数据。另外开一个网页,输入http://localhost:9005/admin/1,可以看到数据流发生了变化,这里获取的就是监控到的数据

通过hystrix的dashboard监控数据流:
如果只看一堆文字的话很能监控,hystrix也提供了可视化界面的方式进行监控
引入依赖:
<dependency>
    <groupId>org.springframework.cloud</groupId>
    <artifactId>spring-cloud-starter-netflix-hystrix-dashboard</artifactId>
</dependency>
2
3
4
在启动类中使用注解激活dashboard
//激活hytrix的web监控平台
@EnableHystrixDashboard
2
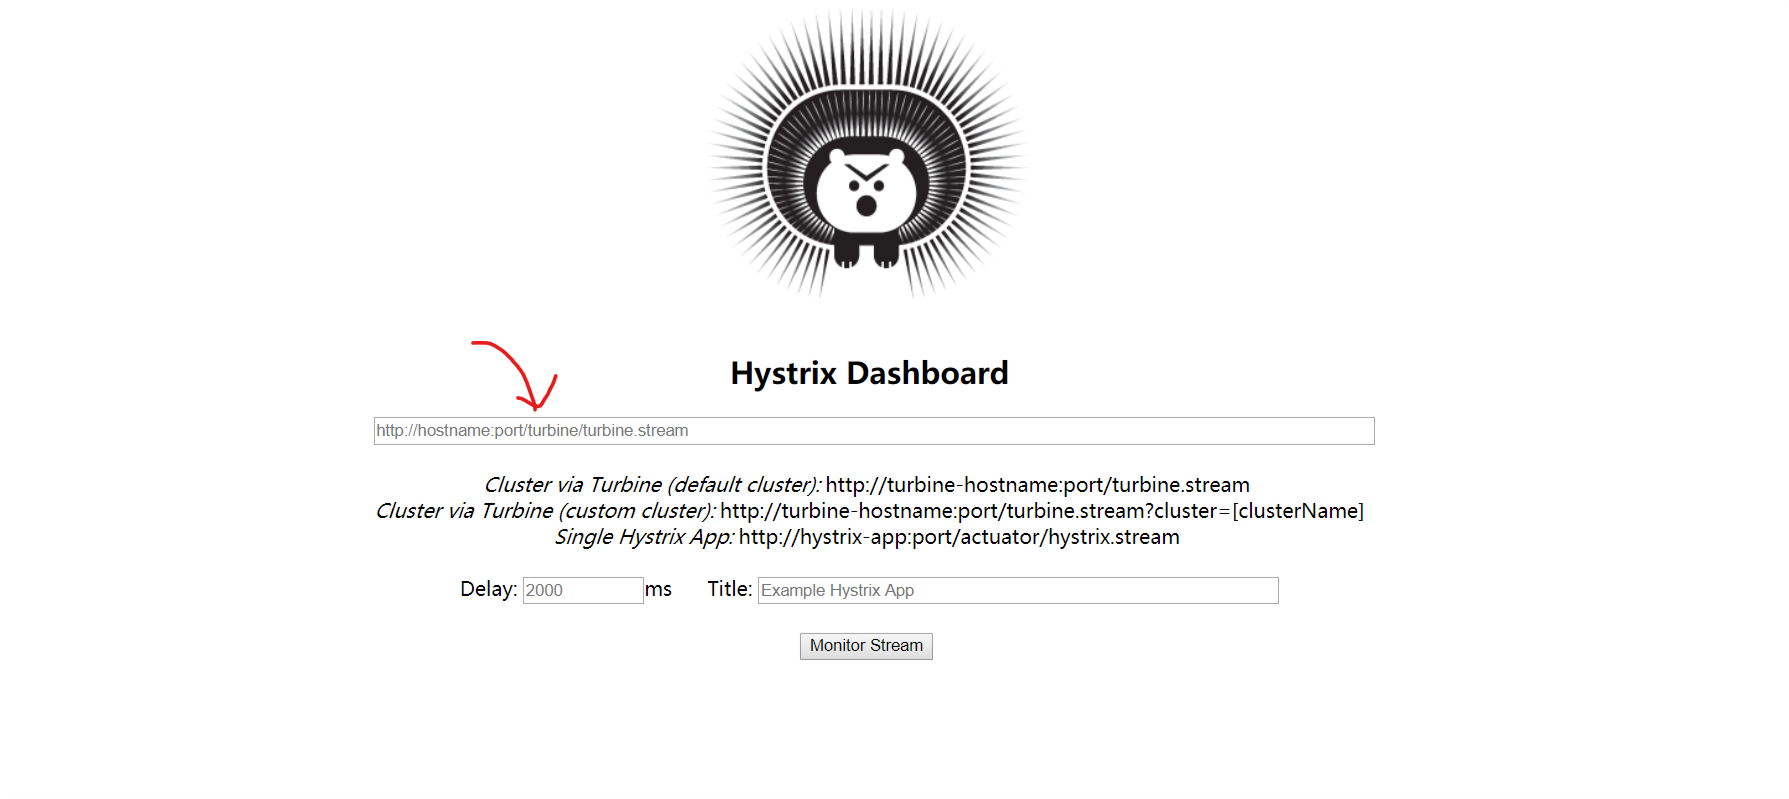
在浏览器中输入http://localhost:9005/hystrix进入监控主页:

在箭头处输入数据流地址:http://localhost:9005/actuator/hystrix.stream,就能看到监控信息了。每一个数字所表示的意思都在图中,熔断器接下来会讲。

# (四)使用turbine聚合所有的hystrix监控数据
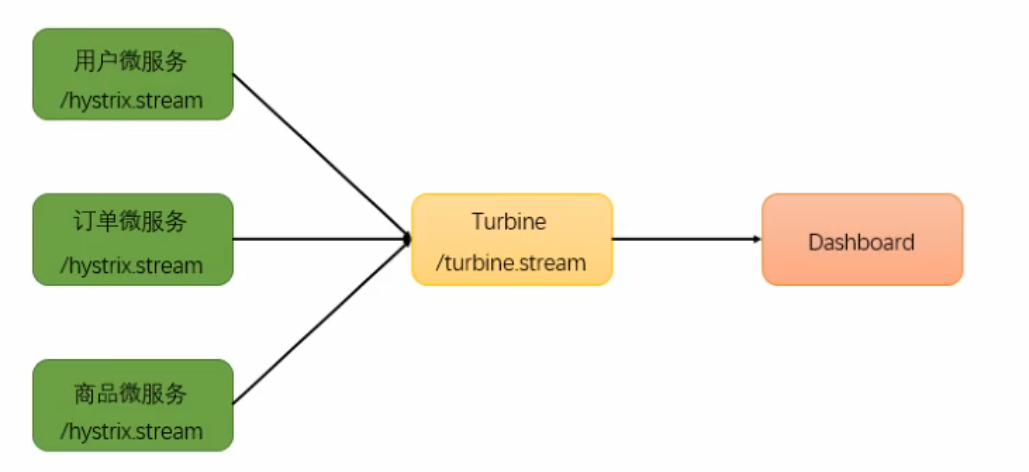
如果每一个微服务都需要分别写监控的话,微服务一旦数量变多就会难以管理,hystrix也提供了turbine对所有监控数据进行聚合操作。

重新搭建一个module,命名为user_hystrix_turbine,这是一个Turbine服务器
引入依赖:
<dependency>
    <groupId>org.springframework.cloud</groupId>
    <artifactId>spring-cloud-starter-netflix-turbine</artifactId>
</dependency>
<dependency>
    <groupId>org.springframework.cloud</groupId>
    <artifactId>spring-cloud-starter-netflix-hystrix</artifactId>
</dependency>
<dependency>
    <groupId>org.springframework.cloud</groupId>
    <artifactId>spring-cloud-starter-netflix-hystrix-dashboard</artifactId>
</dependency>
2
3
4
5
6
7
8
9
10
11
12
创建配置文件:application.properties,添加配置信息,这里设置端口为9030
server.port=9030
spring.application.name=hystrixturbine
eureka.client.service-url.defaultZone=http://localhost:9000/eureka/
eureka.instance.prefer-ip-address=true
#输入需要监控的微服务名称
turbine.app-config=hyfeignadminservice
turbine.cluster-name-expression="default"
2
3
4
5
6
7
创建启动类TurbineApplication,添加注解
@SpringBootApplication
@EnableTurbine
@EnableHystrixDashboard
public class TurbineApplication {

    public static void main(String[] args) {
        SpringApplication.run(TurbineApplication.class,args);
    }
}
2
3
4
5
6
7
8
9
在浏览器中输入http://localhost:9030/hystrix,同样在中间的输入框内输入http://localhost:9030/turbine.stream,就可对所有注册在内的微服务进行监控
# (五)hystrix断路器
在之前的监控数据中,我们看到过熔断器这个选项,熔断器也称断路器,是防止雪崩效应的一种方式。
hystrix自带断路器,断路器共有三种状态:Closed(关闭),Open(开启),Half Open(半开)
Closed(关闭):
默认状态下断路器是关闭的,此时所有的请求都可以访问。
Open(开启):
当请求次数大于20次,且这20次请求中有50%都失败的时候(可以自己设置),断路器就打开了。断路器打开后所有的请求都直接进入降级方法中
Half Open(半开):
当开启状态维持一段时间(默认5秒),就进入半开状态。此时会尝试释放一个请求调用微服务,如果释放的请求可以正常访问了,就关闭断路器,否则继续保持开启状态5秒。
通过断路器,可以防止请求在某一处堆积,造成雪崩效应。
实际测试一下:
这里使用admin_service_hystrix_rest微服务进行测试,首先在配置文件中修改一下断路器的相关设置,方便我们观察:
#触发熔断的最小请求次数,默认20秒
hystrix.command.default.circuitBreaker.requestVolumeThreshold=5
#熔断多少秒后尝试请求,默认5秒
hystrix.command.default.circuitBreaker.sleepWindowInMilliseconds=10000
#触发熔断的失败请求最小占比,默认50%
hystrix.command.default.circuitBreaker.errorThresholdPercentages=50
2
3
4
5
6
adminController采用统一的降级方法,再修改一下getuser方法,当传入的id不等于1时,抛出一个异常,用来检测断路器的实现:
@RestController
@RequestMapping("/admin")
/**
 * 指定统一的熔断设置,在@HystrixCommand不需要单独指定
 */
@DefaultProperties(defaultFallback = "defaultfallback")
public class adminController {
    @Autowired
    private RestTemplate restTemplate;

    @HystrixCommand
    @RequestMapping(value = "/{id}",method = RequestMethod.GET)
    public User getuser(@PathVariable int id){
        if (id!=1){
            throw new RuntimeException("服务器异常");
        }
        User user= restTemplate.getForObject("http://userservice/user/"+id,User.class);
        return user;
    }
    //指定统一的fallback方法,没有参数
    public User defaultfallback(){
        User user=new User();
        user.setUsername("触发降级");
        return user;
    }
}
2
3
4
5
6
7
8
9
10
11
12
13
14
15
16
17
18
19
20
21
22
23
24
25
26
启动相关的四个微服务,进入turbine进行观察,断路器默认是关闭状态,我在浏览器中输入http://localhost:9004/admin/2,不停刷新,断路器打开,此时再调用id=1,也同样返回降级方法,因为断路器打开后所有请求都会被拦截下来。

